Have you ever noticed your favorite candle burning down the center, leaving a deep “tunnel” of unmelted wax around the edges? This frustrating phenomenon is called candle tunneling, and it significantly reduces your candle’s lifespan and fragrance throw. But fear not, there are ways to fix candle tunneling and get the most out of your lovely lights!
In this guide, we will go over how you can fix a tunneled candle, and how you can prevent it from getting tunneled in the first place.
What is Candle Tunneling?
Candle tunneling happens when the wick of a candle only burns the wax in a small circle around it. This is often caused by not burning the candle for a long enough time during the first burn. The melted wax around the wick solidifies before the wax at the edges has a chance to melt, creating a “memory” that the candle repeats on subsequent burns.
How to Fix Candle Tunneling
Don’t despair if your candle has fallen victim to tunneling! Here are two effective methods to fix it, and get that full melt pool that you are looking for:
- The Aluminum Foil Method
- The Heat Gun or Blow Dryer Method
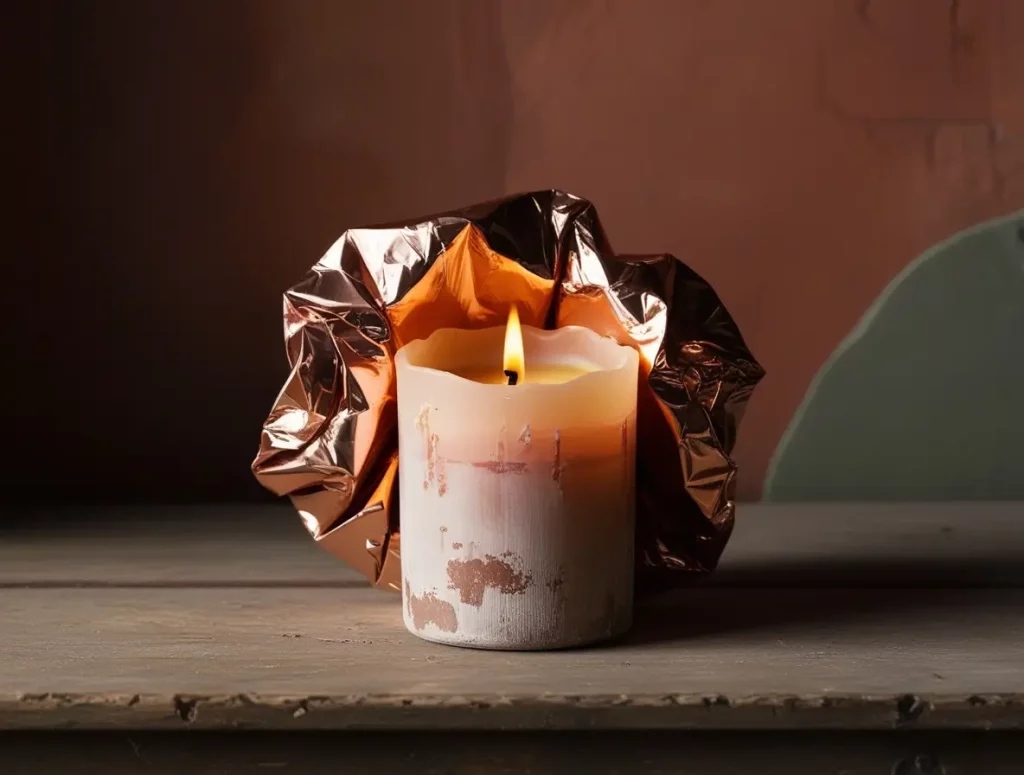
The Aluminum Foil Method
This is a simple and effective way to fix mild to moderate tunneling.
- Gather your materials: You’ll need aluminum foil and a pair of scissors.
- Wrap a foil around your candle: Cut a sheet of aluminum foil large enough to wrap around your candle. Fold the edges to create a tent-like shape that covers the top of the candle but leaves an opening in the center for the flame.
- Light and Observe: Light the candle as usual and let it burn. The aluminum foil reflects heat back down onto the wax, encouraging the tunneled edges to melt.
After this, it’s just a waiting game. Let your candle burn with the foil wrapped around it for up to an hour depending on the size of the tunnel.
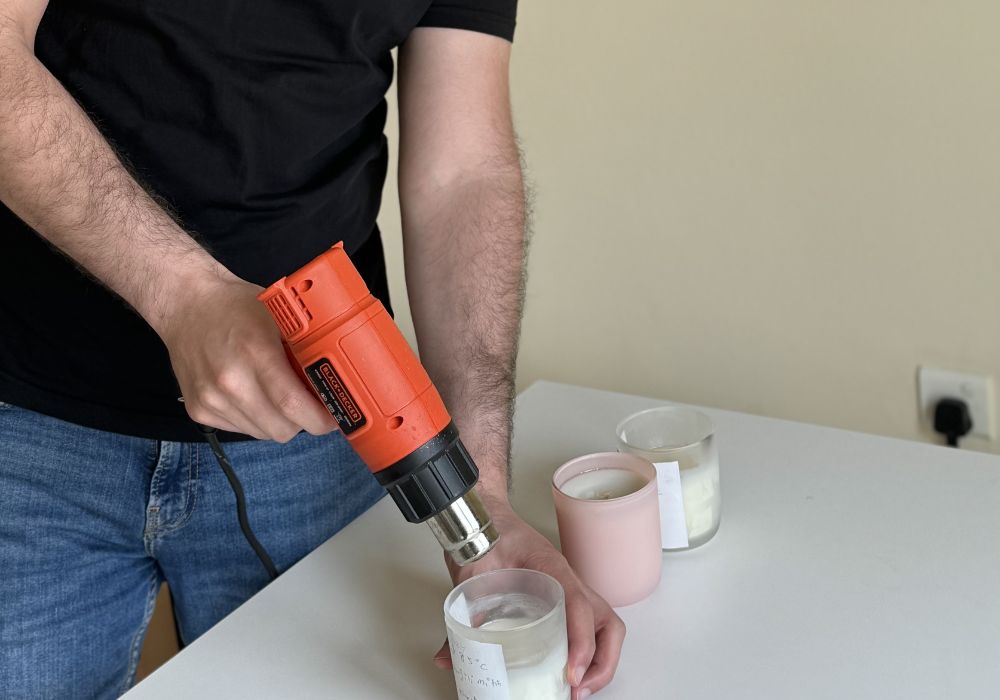
The Heat Gun or Blow Dryer Method
If your candle tunnel is not that big, then you can go with a faster option, and this includes using a heat gun or blow dryer on the unmelted parts until your candle evens out.
Also read: How to Fix Candle Tunneling
How to Prevent Candle Tunneling in the First Place
If you want to avoid candle tunneling entirely, there are a few things that you should consider before lighting your candle, and even after you lit it for the first time, and these things are:
- First Burn is Key
- Trim Your Wick
- Don’t Prematurely Turn Off Your Candle
- Get a High Quality Candle
First Burn is Key
During the first burn, allow the candle to burn for 3-4 hours, or until the melted wax reaches the edge of the container. This establishes a full melt pool and prevents tunneling in future burns.
Trim Your Wick
Regularly trim your wick to ¼ inch before each burn. A long wick can contribute to tunneling.
Don’t Prematurely Turn Off Your Candle
Avoid extinguishing your candle before the melted wax pool reaches the edges. This can also lead to tunneling.
Get a High Quality Candle
In my experience as a candle maker and instructor, not all scented candles in Dubai are as good as you think they are. Sometimes, tunneling does not have to be your mistake. It could be that the candle you purchased was not tested enough, and the wick size is small for the candle.
If your wick extinguishes early, or you notice that the flame is too small that the flame can’t get a full melt pool in the first place, I recommend you reach out to the company that you got your candle from, and try to find a solution with them.
By following these tips, you can enjoy your favorite candles for their full lifespan and fragrance potential. So next time you light a candle, remember these techniques to banish the tunnel and embrace a beautiful, even burn!